Producing The Final Animation
- Mikey Owen
- Apr 25, 2024
- 10 min read

Now that I have an Unreal Engine scene with my Metahuman characters, my audio and my motion capture animations, I'm ready to get to work on the production of this assignment's final deliverable. However, before I can begin cleaning up the motion capture data ready for rendering, I need to create an environment for the animation to take place in.
Creating the Environment
I feel heading this section with 'creating' may have been a bit strong, as 90% of the environment I'll be using for this animation is actually sourced from the Unreal marketplace. I've known since the beginning that I wanted this scene to take place in an office space, so located an architectural visualization asset on the marketplace simply called "Modern Office". A link to this asset can be found here, as well as the main image associated with the pack for your reference:

As you can see, it looks great straight off the bad! Only a few modifications are necessary before it's ready to go. In fact, it was really more just moving a few assets around and adjusting some lighting and texture maps. As this assignment is focused more on the motion capture data than environment modelling, I'll try to keep this section brief while still highlighting the work I've done. To that end, I've summarized the changes I made to office environment below in a short bullet-point list:
Scaled up the size of the keyboards to better match the Metahumans' hand sizes and movements during initial shots.
Duplicated large monitor assets to sit on the desk in front of Metahumans to use as 'look at' targets for initial shots.
Lowered the emissive texture values of the background city image to bring lighting to more realistic levels.
Added rectangular lights above characters to highlight faces more and add shadows to them to better display expression.
Mapped screen capture images onto monitors of college website and tutorial video used for clean up (more on this later in the post).
Adjusted positions of chairs to allow characters to 'sit' on them instead of them being tucked under the desk.
Re-positioned or removed 'set dressing' objects around scene to avoid pulling focus and ensuring camera/s have a clear view of the characters.
Lowered resolution of background plate image to create natural depth of field so camera doesn't have to do all the heavy lifting when its in view.
There you have it, one office environment ready to go! As I said, I didn't need to do much to make this environment perfect for my scene, but I know the focus for this assignment is on the motion capture and subsequent clean up so I really didn't want to spend too much time on this section.
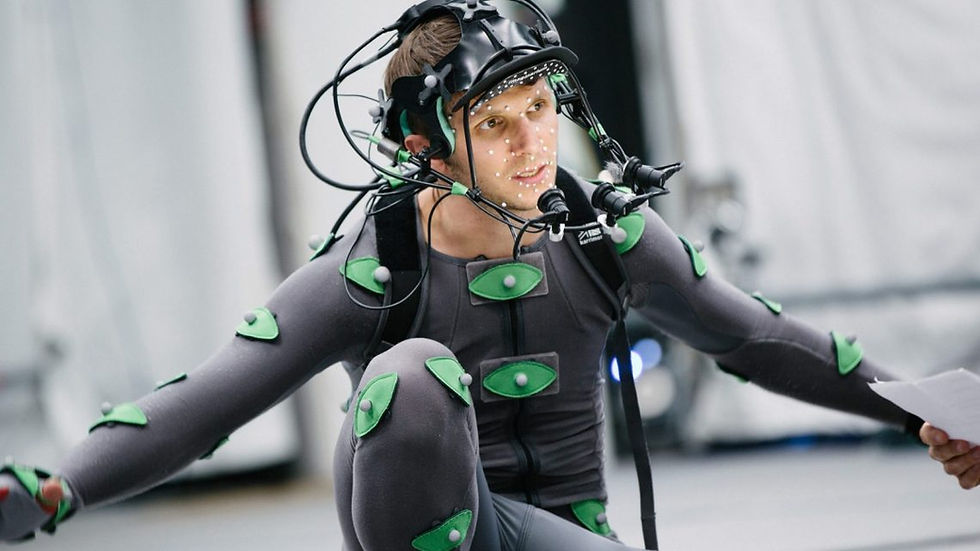
Motion Capture 'Clean Up'
Before I could begin any actual clean up of the animations, I first had a few steps to complete to bake the animation onto my characters and create a new 'additive' layer (I'll explain this shortly). I was provided by my tutors with a great step by step tutorial on adding motion capture data (both body and face) to Metahuman characters, and how to clean up the animation in a non-destructive way (AKA without losing the original animations). I've embedded this tutorial below for your reference, as a lot of the steps I'm about to detail will refer back to this video:
The first step was to obviously move my characters into the correct position for the animation to begin. You'll recall I'd moved the chairs ready for the characters to sit on when producing the environment, so it really was as simple as dragging them over to the right spot before beginning the sequence. Once they were in place, there was a few clean up steps necessary on the characters before adding them in.
Firstly, I opened their respective blueprints, then on the details panel I made my way to the LOD (level of detail) settings and changed the 'Forced LOD' value to 0. This ensures that no matter how close or far the camera is from the character, it will always be shown on their highest level of detail. Next, I opened a new level sequence for my final animation and added the Metahumans into it by highlighting them in the viewport, clicking 'Track' on the sequencer and selecting the blueprints for them. This adds a control rig by default, which actually prevents any added animations from working. I'm not sure if this is simply a bug or by design, but it's an easy fix. I simply selected the control rigs for the body and face and deleted them from the sequence. From there I clicked the '+' icon for the body, selected animation and chose the respective motion capture animation. I then repeated this step for the face, and then both steps for the other character. This left me with both of my characters along with their body and facial motion capture animations ready to go!
Now, before beginning the clean up phase, it was important to next add my cameras to the scene. In assignments past, I would have cleaned the entire animation first before adding the cameras. But it's important to me, especially with the time constraint I now have due to my health issues, to be smarter with my workflow. I knew my cameras would not have both characters in their entirety visible at all times, so by placing my cameras first I could identify exactly what movements of each needed to be cleaned up for the final sequence. I also decided to experiment more with the cameras than I had do so in the past. Previously I would have used the default aspect ratio of 16:9 and experimented with lens values to get the desired shot, but I decided to look back once again at the scene from which my audio originates. I've included it again below for your reference:
You'll notice that the aspect ratio of these shots is more widescreen, and this results in a much more cinematic shot. I therefore decided to experiment with the camera properties to try and replicate this as closely as I could. I found that using the preset of IMAX70mm with the camera cropped to the 2.39 setting was nearly perfect, so proceeded with this. I then placed 5 cameras in the scene with the intention of having an extreme close up shot of each character, a wider over the shoulder two shot for both and finally an establishing shot from the side of both characters together. I then tinkered with the F stop values for each camera to add some depth of field matching the Other Guys clip above (blurring the backs of the heads of the characters closest to the camera, as well as the background behind the character in focus) and the cameras were good to go! I added them all to the sequencer, and cut the camera sequence to vary from each characters extreme close ups, to the wide shots, to end with the establishing shot (backwards I know, but trust me it works in practice!). Now that I knew exactly what movements and expressions would be visible through my animation, I knew exactly what needed to be 'cleaned up'.
Now it was time to move onto the clean up itself. I of course first allowed the animations to run through in their original state so I could make some primary notes on what changes were necessary. It certainly didn't look terrible, but the most obvious part to me was the lack of movement of the character's eyebrows, as well as the uniformity of their movements. The latter may seem like a strange thing to take issue with, but we as humans do not move perfectly in symmetry (i.e. raising both hands in exasperation at exactly the same time and speed), so the result when a character does do that is that it looks unnatural. I've rendered the sequence out as is without any clean up for your reference so that we can further dissect it in detail below:
I think you'll agree with me that these camera angles work great for the scene, and I can definitely already see the benefits of placing them prior to clean up now. In reality, rather than having to clean all 4 animations for the entire sequence, it's really only half of each, theoretically cutting my workload in half! Either way, when I watched these footage myself here are the notes I made around what specifically needs to be cleaned up:
Characters are not looking the correct direction. Will needs to begin scene looking at monitor, Mark also at his own one. Throughout animation their focus then needs to shift to each other.
When Mark yells at Will to stop humming the song, there's very little brow movement. In fact, there's very little brow movement throughout the animation. Eyebrow changes are key for expression, ensure these are animated correctly.
Will's finger when he points at Mark obscures his face completely. He also points at the ceiling as opposed to at Mark.
Will shifts awkwardly in his chair during final shot. Believe this may be due to glitch in the actual capture, believe this can be resolved in clean up. Also raises arms too high in final shot, looks unnatural.
Marks fingers clip through the keyboard in the final shot, and his legs also go through the chair and floor. This is possibly due to capture being acted by a shorter woman so results in inconsistencies.
No one blinks throughout the entire animation. A small detail, but very noticeable.
Every time the camera cuts, Will's hair has to resettle into place. Believe this is an issue with Unreal rather than animation. Possibly could be fixed by allowing warm up frames for each camera cut.
So as you can see, there's not as many changes needed as expected, though this list is by no mean exhaustive. I have no doubt there'll be other changes necessary as I examine each frame in detail. But for now, I have a great foundation for where to start so it's time to begin the clean up process.
To do this, I refer back to the tutorial video I embedded earlier in this post: it advises that the best way to clean a motion capture animation is through the use of additive layers. This is because this allows you to key-frame animate over the top of the motion capture animation in a non-destructive way, which means that any changes you make will actually supplement the original animation, not override it. This is perfect because it allows me to play around to achieve the desired result without fear of erasing something, or potentially having to remove large segments of the animation and manually key-frame in a replacement one frame at a time!
The first step in this process was to bring back the control rigs I removed earlier, and to bake the animations to them. To do this it was as simple as right clicking the body of the character in the sequencer, scrolling down to 'Bake to Control Rig', and selecting the 'MetaHuman_ControlRig' option. This opens a new window where I have the option to either reduce the keys or adjust the tolerance of the baking process, but as the animation is exactly as long as I need it to be and we are going to manually make adjustments, I left these at default and hit 'Create'. This brings back the control rig for the character and creates key frames for all controllers at ever frame! It was then simply a process of repeating this for the other character, as well as for both characters' faces (though the face control rig that it needs to be baked to is actually called Face_ControlBoard_ControlRig as opposed to MetaHuman. This is the standard facial rig, it's just named obscurely).
Now it's time to add the additive layers. To do so it's as simple as clicking the '+' button on the control rigs (both bodies and faces) and selecting 'Additive'! Or rather, it should be, but in my case it would add a new layer but not allow any edits. I discovered this was actually because, by default, the character blueprints had the "Additive Settings" set to "No Additive". I have no idea why this is in place, and it took a long time to figure out how to fix it, but at least I found that if you change this option in the Blueprint details to "Local" it allows you to add an additive layer correctly. With my additive layers in place, it became a process of selecting the right frame, then simply key-frame animating the rig controllers into the correct position. I chose to manually add the keys on the sequence for these changes, as the auto-key function has a bad habit of either ignoring your inputs or adding keys when it shouldn't. The process was exactly the same for the body, except I chose to use the actual sliders within the sequencer to change the face bone movements rather than the control rig. This is simply because I find the Metahuman facial control rig to be a little too cluttered, and it's much easier to locate the 'bone' I want to move from a drop down list.
I make the process sound simple, and that's because it really was, but the time spent on this animation came from experimentation and attempting to perfectly replicate the human body and face. I'm lucky that the workflow was so straight-forward, because it allowed me to devote the majority of my time to cleaning the animation as best I could. Therefore, after many revisions, I had a result I was content with. I say content, because it will never be perfect. This is either down to my nature, or simply because it's so hard to replicate an actual human body's movements and there's always room to improve. But I digress, it's time to render the final sequence and evaluate my results!
Rendering The Final Animation
With my clean up phase completed, it was time to render out the final sequence. I chose to output the animation as a simple png sequence, 1080p HD resolution at 30 frames per second. I also did not include any post production phase, as I wanted the focus to be on the actual motion capture for this assignment, as I have a separate visual effects assignment which focuses on post production. The only issue to really rectify was the aforementioned problem with 'Will's' hair, where it would 'bounce' in every time there was a camera cut. I theorized this was to do with the render 'starting up' again for each new shot, so managed to fix this by adding an anti-aliasing option to the render, giving it 300 warm up frames for each cut, and proceeding. This fixed the problem completely, so I give you the final animation:
I'm really pleased with the result, not just because I feel the clean up has drastically improved the end result, but also because of how I was able to keep my focus on the animations themselves and stick to the assignment brief. This isn't something I usually do, as I have a tendency to lean towards perfectionism and loathe to call my work 'finished', but this assignment has taught me a lot.
The importance of clean up is clear to see in the final result, and the limitations of motion capture are obvious. It would be incredibly difficult to have a perfect animation ready to go without any clean up, and really shows the importance of having a highly skilled motion capture actor and engineer when creating an animation. But this technology truly blows me away with how much time it can save when creating an animation as foundation. I'm really happy with how the final animation turned out, and I can't wait to adopt the workflow I've developed here into other projects!

Comments