Capturing VCAM, Post-Production Workflow & Final Animation
- Mikey Owen
- May 18, 2024
- 19 min read

I can now move onto the final phases of this assignment; capturing the VCAM footage, rendering my animation (along with sufficient render passes), completing my post-production workflow (including transitions, colour correction & audio) and finally submitting my assignment!
In this post I want to breakdown those three phases in as much detail as possible, as I'm also required to complete a in-person presentation on the assignment as a whole once I submit it. I'll begin first with the VCAM process.
Capturing my VCAM footage
Now, as you know from the previous post, capturing VCAM footage has been suprisingly difficult from day one. Considering this stage was essentially where I 'left' the assignment due to my health concerns, you could argue that this has taken me over a year to actually get working. I am pleased to report though, that after a lot of trial and error, I was actually able to achieve the result I wanted!
In order to do so, I first had to upgrade my project to Unreal Engine 5.4. This is because Epic had improved the functionality of the VCAM process, and had even updated the VCAM application on phone and tablet devices for better compatibility with this version of the engine. This was a simple enough process, right clicking my project executable and selecting 5.4 as the engine version. I'm pleased to report this didn't 'break' anything within the level, which was my primary concern.
From there, I downloaded the new Unreal VCAM app on both my new iPad as well as my Google Pixel phone to serve as a back up. Connecting the devices was fairly simple, but to ensure it worked smoothly I took a few additional steps to avoid any potential issues. It's all covered in this tutorial which I followed, posted below:
I can't really say "it's all in this video" though when explaining a workflow, so I've attempted to breakdown the steps I took to connect my devices into the bullet-pointed list below:
Open the plugins menu of my Unreal Engine scene and enable "Virtual Camera", "Virtual Camera Core" as well as the Apple AR Kit plugins (these are not necessary anymore following the update to the application, but I certainly couldn't see the harm in enabling some additional plugins to assist with Apple device connectivity). This required a restart of the engine.
Open my project settings and navigate to the UDP Messaging tab, then enter my PC's IP address as the 'Unicast Endpoint', ensuring I end the address with ':0' to ensure Unreal remembers it.
Now these are really the only steps mentioned in the video, aside from adding a VCAM actor to the scene of course, but unfortunately for whatever reason I had to take a few additional steps for my devices to 'talk' to each other. I'll continue these in another list below, but just wished to highlight the additional effort required:
Disable my firewall for a private network, ensuring all my devices were on the same Wi-Fi network. This prevents windows firewall from blocking the connection, which did appear to be the case initially.
Navigate to the 'Frame Buffer Pixel Format' section of project settings, and ensure that it has '8bit RGBA' selected.
Enable the 'LiveLink' plugin as well. This is an older plugin that exists for the Live Link menu that VCAM derives it's functionality from, therefore enabling this from the start will assist in the devices communicating.
Entering my device's IP address as the 'multicast endpoint' under the same UDP messaging section of project settings. This allows the engine, and subsequently my network to hone in on my device and filter out any wireless traffic.
Adding a VCAM actor to my scene, selecting it and choosing the 'VCAM' component of the blueprint in the details panel. Then checking the 'Override Resolution' box under the Output settings. Then change the LiveLink subject of the settings to 'Camera Transform', which opens up the VCAM overlay.
With the above steps taken; I used the Live Link tab '+ Source' button to locate my device once I'd selected my Unreal Engine session on the device's app. This worked, and was the first real success I'd had with VCAM up to this point. From here I could move onto capturing my footage, although this is where far more issues presented themselves...
Rather than breakdown the steps I took which didn't work, I feel it would be best to explain the working method I used to capture my final shots. I feel like I've spent far too much time discussing the issues with VCAM, when in reality (after getting it working) it's an incredibly powerful tool which really elevated this animation! To that end, below is another list detailing the steps I took to capture my final sequences once the device was connected to my VCAM actor:
Using the VCAM overlay on my device; I selected the Cinecam actor for the relevant sequence I wanted to capture for, using the drop down in the top right. From there I could toggle the paper clip 'attach' button to ensure the VCAM followed my Cinecam actor's pre-recorded motion and settings for the shot. This was great as it allowed me to keyframe some of the more sudden movements using a Cinecam actor so I wouldn't have to rely on my own timing to capture it correctly. If I didn't want that to be the case however, I could simply select the camera to get my VCAM in position, then toggle the attach button to select the settings myself.
Selecting the 'VCAM_Actor_Record' actor which is generated into the blueprint in my scene once takes had been captured. Then altering the crop settings to match my previous cameras ratio of 2.39. Allowing me to keep consistency with my pre-visualization.
Using the take recorder window which opens when recording a VCAM session; select the clapper button to choose a sequence to record directly into. This allowed me to do as many takes as I desired for each sequence, ensuring the recording would last for exactly as long as my sequences dictated. Additionally, but most importantly, it meant I could actually see the animation sequences taking place that needed to be recorded.
If I needed to do any fine tuning of the VCAM recordings once I was happy with them, I could see which clip the VCAM had made by checking it's name in my sequencer. From there I could go to the folders generated by VCAM called 'subscenes for sequence X', with X being the sequence it was recording into. There I could open the VCAM recording in it's own sequencer and make alterations there. This included key-framing focus shifts, something which would be very tricky to do on the fly while focusing on following the actors. Additionally, I could use additive layers (see my Performance & Technical Animation assignment) to make adjustments to the camera movement in a non-destructive way without having to battle with existing keyframes.
Further to the above, using these subscenes would unfortunately mean the rest of the data from the original sequence wouldn't be present when making adjustments. This either meant making changes, going back to the original sequencer to test, then repeat. Or, as I discovered; I could drag the original sequence into my scene, navigate to animation in the details panel and check the 'loop' box. This put the animations on a loop in my scene, so allowed me to fine tune the VCAM footage without having to swap back and forth.
Needless to say, discovering the above took a lot of trial and error. I'm glad to have finally established a consistent workflow with this feature, because it really does enhance the cameras within my animation. Either way, all I had to do now was simply hit 'record' on the Take Recorder, and voila! This is really as simple as it should have been in the first place. With my VCAM footage recorded for my scenes (note, I did actually change a few of the camera movements, as well as the shots themselves from the previs, to accommodate this new feature), I could then move onto exporting my final frames.
I did run into a new issue here, where the first few frames of each shot would always render incorrectly. I have no idea why, but was frankly used to this at this stage. I did allow 10 seconds worth of render warm-up frames, but this sadly didn't fix the problem. I don't know if this is a VCAM issue, but I did find that running the sequence through render a second time would fix it. However, this would always without fail result in the scene crashing. Upon relaunching to render the other shots, the same issue would happen again. This meant going through the process of rendering each shot twice, with an engine crash in between each shot...
Anyway! When rendering my shots, I knew from the brief that I had to include various render passes to enhance the final animation when composited in post-production software. I therefore used the new features of the render in Unreal Engine 5.4 to include passes for the following:
Ambient Occlusion - a black and white pass which is used to enhance 'edges' and the shadows on them.
Base Colour - simply the frame in it's base colours, with no shading applied by lighting.
Final Image - the image as it appears in Unreal's viewport.
Metallic - highlights the metallic reflections present in the frame.
Roughness - highlights and enhances the texture roughness present in the frames in a black and white format.
Scene Depth - a greyscale frame which emphasizes the distance between the meshes.
Specular - this highlights the specular lighting present within the frame.
For your reference, I've included a small gallery below of a sample frame and examples of it's various render passes:


I think these render passes are going to work to great effect when incorporated into my post-production workflow! Speaking of which, with my VCAM shots finally recorded, it was time to move onto exactly that.
Before doing so though, I just want to quickly highlight the two changes I made to the animation from the pre-viz phase due to the utilization of VCAM. They are as follows:
The opening shot, rather than being a wide establishing shot showing the survivor in the foreground searching the boxes. This has now been altered to be a much more close shot from the monster's point of view as they weave behind a porch railing examining the survivor. Feedback from my tutor said that the survivor character felt a bit washed out in the original shot due to him wearing green and the surrounding colour pallet also being green. I think this change works much better at establishing the kind of animation this is going to be, and shows the survivor we're following in much better detail than the previous version.
The penultimate shot of the survivor sitting on a sofa has now been combined with the previous one. This creates a longer shot as the camera shift from them standing near the door to simply sitting down was quite jarring. This way I was able to use VCAM to 'look' around the environment and show it in more detail before settling on the survivor as they take a seat. I think this has helped the flow of these shots to no end and much prefer this new sequence.
Post-Production Workflow
For my post production workflow, I actually had to leave my comfort zone a bit and learn an entirely new editing software called Da Vinci Resolve. I'd heard of Da Vinci Resolve in the past, and it came highly recommended by my tutor for two reasons: one, it's free, and two, it has an incredible colour correction suite rivaling the most expensive editing software platforms.
Before I began using the software, I wanted to get some basic knowledge under my belt so the transition to this new package wouldn't be too daunting. I therefore located a tutorial which explained the basics:
The above video was incredibly informative, and gave me a good basic understanding for how to proceed with my post-production! Of course there would be more niche things I'd have to learn which weren't covered here, including the compositing of my render passes, which is where I'd chosen to start.
I recalled some previous experience with Adobe Premiere PRO on how to achieve this. Knowing I would have to essentially 'layer' the render pass sequences on top of each other, then apply a blending mode to combine them into the final image. The main challenge of doing this though was navigating Da Vinci Resolve's layout to locate where exactly this takes place.
I discovered that you need to navigate to the 'Fusion' tab of the software, which in hindsight makes sense as you are fusing the different sequences, and discovered that Da Vinci Resolve actually operates on a node based system not too dissimilar to Unreal Engine. To achieve the compositing I wanted, I needed to essentially take a beginning and end, in this case the 'Final Image' render pass as the starting point, and the end point being an output of everything in between. From there I dragged the corresponding render pass sequences into place between that start and end point, then used the tool bar on the right to adjust the 'apply mode'. This apply mode contained all the terms I was familiar with from Premiere PRO, such as 'multiply' and 'screen', so I was back in my element here. Under the same menu I was also able to adjust the 'gain' (how dominant the effect was in the final image) and 'blend' (how much the pass blends with the original sequence).
It was fairly straight forward, and there was no rule of thumb on which compositing method worked best for each pass, but I've summarized the general values I used for each pass below:
Ambient Occlusion - Multiply blend method, with a gain of roughly 0.3 and a blend of 0.6
Base Colour - Overlay blend method, with a gain of roughly 0.4 and a blend of 0.5
Specular - Multiply blend method, with a gain of 0.4 and a blend of 0.8
Scene Depth - Difference blend method, with a gain of 0.3 and a blend of 0.45
Metallic - Overlay blend method, with a gain of 0.9 and a blend of 0.1
Roughness - Multiply blend method, with a gain of 0.3 and a blend of 1
As I said, these varied from shot to shot, but I wanted to evidence the general approach I took with each sequence before fine tuning the shots. I've included a screenshot of the node based timeline I mentioned below for your reference:

I felt the compositing of these passes was incredibly effective, and I have to say it made a much more noticeable impact on my animation than it would have in say, Premiere PRO. I think this is a testament to just how flexible Da Vinci Resolve is and just how much fine tuning it gives to the user for their projects.
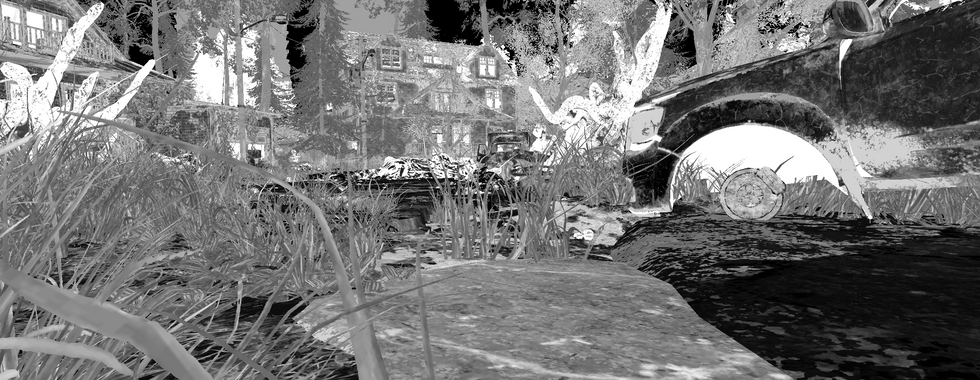
I've included a before and after screenshot below for a sample frame with and without render pass compositing for your reference:
NOTE: for some odd reason, the images uploaded below are incredibly dark, even though this is not how they appear in Da Vinci Resolve. I've increased the brightness to make them visible through the Wix editor, but this of course results in pixelation and washed out textures. Unfortunate, but bear in the mind the actual result is much better than this.

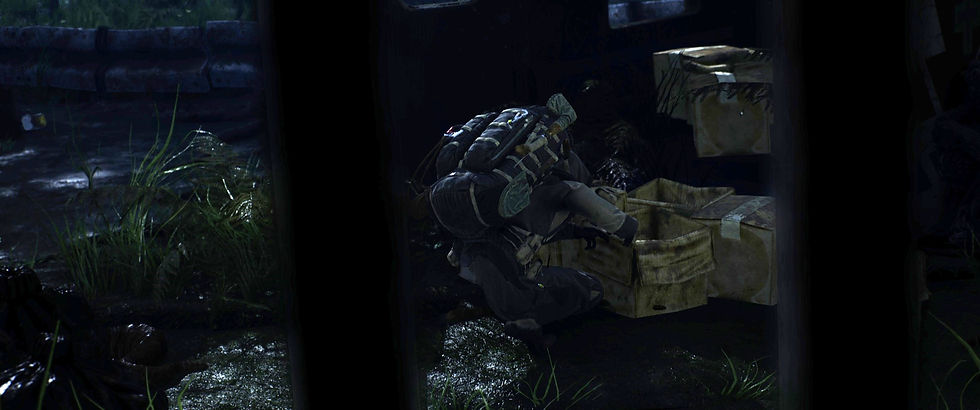
As I mentioned in red above, I have no idea why these screenshots have come out so dark, but unfortunately I was unable to fix this. Hopefully you can still see the benefits of compositing the render passes, particularly in the top left of the image. It has enhanced the textures on the road-side railing, as well as the shadow underneath it.
Additionally the zipper on the character's arm, as well as the vibrancy of the clothing on the survivor have been greatly enhanced. It's unfortunate I've not been able to show this here properly, but it's effectiveness will become clear in the final animation.
I then moved onto finalizing the flow of the narrative. This involved trimming down shots, adding transitions, spacing them out etc in order to keep my animation compelling and ensure it tells a coherent story. For the shot pacing I actually went back to my pre-viz, examining what I wanted each shot to convey. I also looked at how well each shot transitioned into the next one and made the following changes:
Adding a fade in from black for the opening shot. This gives the audience time to settle into the animation, rather than simply having a jarring full frame beginning.
Adding a 'cross dissolve' from the first to the second. If you recall, the second shot is of the creature running in front of the camera. Having the first fade directly into the second avoids the camera cuts from being too jarring as the location change is quite sudden otherwise.
After the 4th shot, where we see the monster on the roof looking at the survivor, the 5th shot is the survivor suddenly hiding. Originally this felt quite sudden as there's no indication in the animation that the survivor has seen the monster. I therefore left a gap between these shots of a few seconds where I can use audio of the monster's 'roar' to tell the story. This way the audience recognizes the danger the survivor is in and it justifies his need to hide in the next shot.
After hiding, the following shot is the monster on top of the ambulance searching for the survivor. The original transition from one to the other felt quite jarring for similar reasons to those above; the location change was quite sudden. In order to avoid repetition of cross dissolve transitions, I actually applied a 'brightness flash' here. This is where the shot fades to white, and then back in. This also assisted with the fact that we go from one 'dark' shot to a lighter one.
When we transition from the monster's POV shot to the survivor indoors, I felt there needed to be a slight gap here to space out the location change. I therefore opted for another 'fade out' for the POV and 'fade in' for the interior shot. This allowed the audience to understand that time had passed to justify the narrative of the survivor now being indoors.
For the final shot where the survivor is attacked, I used a 'camera shake' transition. Similar to the blueprint of the same new used in Unreal, this violently shakes the footage, and features vivid colour changes before fading to black. This ultimately proved really effective at highlighting the tension and danger of the closing moments.
This covers the pacing and transition adjustments for the animation, and I'm really pleased with how it's coming along so far! Before moving onto the audio, I now needed to work on arguably the most import element of post-production: colour correction and visual enhancements.
This is an area I have some experience in from previous projects, but I can openly admit I have under utilized it in the past. I was determined to make the most of this, especially given Da Vinci Resolve's reputation for having one of the best colour correction suites available, so I once again took to the internet and found a great tutorial for getting the best results! I've included this below for your reference:
The creator of this tutorial, William Faucher, is someone who I've followed since the beginning of my CGI journey, and his advice here certainly didn't let me down. I did however discover that he recommends using a different export format for your frames (16bit EXR files) as well as a plugin which will allow for much more control during colour correction. I'll be honest, while I did consider going back to render new frames to take advantage of this, the difficulties I'd had with VCAM previously lead to me opting to simply continue with what I had and make the most of it. I will certainly keep this video ready for the post production of my final project so I can take advantage of it fully in the future, but for now I'm confident that what I have will produce an equally impressive result.
But I digress, moving onto the colour correction phase: arguably, I can't just call it colour correction, as a lot more went into it than simply balancing the colours of the sequence; contrast adjustments, adding artificial lighting to enhance areas, vignettes, glow effects etc. But colour adjustments were certainly the focal point. Similar to the render pass compositing, Da Vinci Resolve operates colour correction on a node connection system, this time located in a tab of the software called 'Color'.
I followed a standard approach for the majority of my animation (aside from a few outliers which I'll discuss shortly), so I feel it's best to break these down into another bullet pointed list below in order of how I added them in the node sequence:
Contrast - Contrast is a term for essentially adjusting the brightness and sharpness of an image. As you'll have noticed from the example images in previous sections, this project was quite dark. I therefore added a new node, titled it contrast, and used the curve editor to bring the brightness up just enough to make all the details visible, but not so much that it would over expose the image. I then brought the darkness of the blacks down to avoid the image looking too artificially sharpened, and then fine tuned this to my liking for each sequence.
Colour Correction - My colour pallet research on the previous post lead to my animation being dominated by a lot of greens and blues, meaning any other colour was essentially lost. This also resulted in the images looking very artificial, as in real life, especially on a cloudy/foggy day like my scene was set in, colours are not that vibrant. I therefore took time to alter the saturation of each shot to bring the colours into more realistic levels, and then altered the temperature value of the sequences to 'heat them up' and remove some of the harsh blue lighting. If necessary, I could also use the curve editor here to adjust individual highlights on the 'Red', 'Green' and 'Blue' scales. Though surprisingly this wasn't really necessary to achieve a great result.
Glow - Taking a page out of William Faucher's book, he added a subtle glow effect to his sequence which added some great atmospherics to the lighting of the scene. Here it worked equally as effectively at enhancing the fog in my sequences, as well as adding a natural glow to the light in my scene. To do this, a 'Glow' effect was simply dragged into the node order from the effects tab in the top right, then the spread and gain values were adjusted to achieve the result I wanted.
Vignette - Using the glow node as a base, I then added a circular mask in the center of my sequences, dragging the edges to meet the edges of the frames. I then clicked a button to 'invert' the mask, and adjusted the values to create a darkened, smooth, oval border around the shots. This worked wonders for keeping the action focused on the center of the shots, and for some reason actually served to make the sequences look more realistic, or at least cinematic!
Artificial Lighting - The final step for my general approach to this phase was to add artificial lighting to the shots to either enhance areas where I wanted my audience's focus to be, or simply to brighten up areas of the shot which didn't appear to be lit correctly. To do this I used a similar method to the vignette, only this term the mask was not inverted. I then resized the mask, placed it in the area I wished to light, adjusted the size and settings and voila!
This covers my general approach to colour correction, though there were a few outliers which I'd like to address. The first is the interior shots. Originally these were very dark, especially compared the outdoor shots which were already quite dark themselves. I therefore used the contrast to really up the exposure, more so than with the other scenes, to ensure all the details I'd painstakingly added to that room were nice and clear. This was important to me that the audience could see these, especially given the changes to the last few shots with the longer VCAM clip to really allow the room to be seen.
Then there was the point of view shot for the monster. Here I added a 'Radial Blur' to the shot to bring a circular blur around the edges of the shot. This gave the implication that the monster had an almost 'telescopic' sight, and worked to great effect! I then also used the colour correction to add more red highlights to keep red as the dominating colour, but not so much so that it was the only colour if that makes sense. It will become clear in the final sequence, but my aim was to tint the image, without it looking like I'd simply slapped a red coloured screen over the top.
This brings me to the end of this phase of post-production, and before moving onto the next one, I wanted to show some side by side images once again to demonstrate the effectiveness of this process (thankfully these worked out much better than the render passes one). I've therefore included these below for your reference:


As you can see, even though Wix has once again darkened the images a lot, it's really made a huge difference! The shots are coming along great and I could now see the final animation for what I'd originally planned it to be! The final step before producing that final render was audio production.
Audio production was another thing which I'm similar with, having recorded all my own sound effects for projects in the past. But given the professional quality I was aiming for with this animation, and the fact that I was new to mixing audio with Da Vinci Resolve, I decided to take a different approach.
Before I began any mixing, I decided to sit down and write a list of all the possible sound effects I would need to cover the bases for this animation, and the list was quite extensive. I then took to both YouTube and free sound effect libraries online to try and find the best quality samples for each- even grabbing multiple options for the same noises to either mix together for some variety, or at least keep my options open if ones didn't work in practice. I've included a screenshot below of my file explorer showing all the audio files I obtained for this cinematic:

As you can see from the image, it's a fairly extensive list. Ranging from ambient background noises like wind and the creaking of floorboards, to more specific sounds like footsteps on grass or bushes rustling. I'm pleased to report that I found a use case for every single audio file.
I took to work adding them to my timeline, then painstakingly matching them to the exact frame they would need to play on. This took a substantial amount of time, especially matching footstep effects. I also had to adjust the gain of each to avoid them being too dominant. Making sure the noises of the wind were just background noise, leaving the full audio range for the specific noises like breathing or the monster roaring. Some even required adjustments to their speed, like the gas mask breathing sound effect when the survivor was running. I also had a scream sample ready for the final shot of the attack, but needed to make it sound like the character was wearing a mask. I therefore had to use the equalizer setting to lower the pitch and add some reverb to echo the effect. For the POV shot I needed to distort the sounds to make them sound more alien and like they were coming from inside the monster who's head we were piloting etc.
Overall, it was a heck of a lot of work, but I'm extremely proud of the final result. I've included a screenshot of the full timeline below to give a visual aid to the work that went in, but it was actually too extensive to fully fit into the screen, given my need for 5 different stereo tracks and two mono ones (changing the speed of audio made it crackle in a stereo channel for some reason, however mono fixed the problem).

All that remained now was a custom produced music track. I actually spoke to my friend Brad Bloomfield who works in the music industry and has assisted me with project tracks before, and he agreed to produce one for this project.
Unfortunately I'm still waiting on this track currently, but for now, here is the final rendered animation. I exported it from Da Vinci Resolve as a 1080p HD mp4 file at the best possible quality.
I will of course update this post once the music track has been received, but even so I'm incredibly proud of this deliverable. I set a goal for this assignment a long time ago before my health issues, and I was determined to see it through. It means a lot to me that it turned out as well as it did, and has further fueled my desire to put out the best final project I can for this year.
Of course if I were to do it again, there are changes I would make. One would be utilizing VCAM better now that I know a concrete workflow for it, with another being the use of the EXR file format so I could really fine tune the colour correction. Either way, that brings me to the end of the last assignment before work on my final project enters full swing!


Comments