Examining the Second Brief & Initial Ideas
- Mikey Owen
- Apr 30, 2023
- 9 min read

Having now completed my first VFX assignment, it's time to move onto the final coursework for this module.
As I've done with all previous assignments, I'd like to take this first post to examine the brief documentation in detail. From there I can breakdown each section to establish what I need to do to achieve the best result possible, and then I'll start discussing some initial ideas for the deliverable.
We've been provided with the brief for the assignment, which I've included below for your reference:
General Overview
Unlike the previous assignment, this one focuses more on the virtual production side of visual effects, as opposed to what is commonly considered an 'effect' in animation.
During the course of this assignment, I'll need to apply a multitude of virtual production techniques to create a unique 30 second animation within Unreal Engine 5. This will begin with first establishing a theme for the animation, including narrative, characters and environment.
Once these are established, I'll need to devote my entire focus to the cinematography of the animation. I'll need to take great consideration with things like camera movements, shot types, lenses, lighting, framing of shots, the overall composition etc. The main thing that will separate this animation from those I've created in the past however will be the use of VCAM (virtual cameras).
The assignment brief stipulates that I'll need to use VCAM filming for my animation in one or more different ways. I can identify the ways possible to me early on here due to my technology limitations: Android & HTC Vive (as these are the only VCAM filming options available to me without investing in additional hardware). So, this essentially means that I'll be adapting a new Unreal Engine plug-in to film my animation in real-time using both my android phone (Google Pixel 4a) & HTC Vive virtual reality headset as the cameras!
Once I've completed this, I'll then need to edit and compile the final sequences using a new editing software option for me: DaVinci Resolve.
As with the previous visual effects assignment, this brief has been broken down into 3 sections: Pre-Production, Production & Post-Production. I'll therefore be applying the same breakdown headings in this post to streamline my examination of the brief.
Pre-Production
The pre-production section, as the name implies, will be the first part of my journey with this assignment and will need to be completed before any formal production can begin. The brief lists the requirements of this section which I've duplicated below, along with a small notation on how I aim to achieve each part:
Pitch a Short Animation Idea - This is exactly what it sounds like. Just establishing the idea for my narrative, the most obvious first step before any groundwork can begin. I'll need to build upon just the idea though into a pitch format, using justification for why my idea would meld well with the objectives of this assignment.
Visual Development - This is a phase of pre-production I'm very well acquainted with at this point. I essentially need to build upon my narrative idea by establishing references, and from there a moodboard and general colour pallette for the animation. I'll then be able to produce concepts & a storyboard for the final project.
Consider and Choose Camera Lenses - Whilst I'll be establishing the camera shot types and movements during the storyboarding, I'll also need to put great consideration into the types of camera lenses I'll be using. This is a big part of the assignment's intended learning outcomes, so I'll really need to explore every option available to me here, then apply the most effective choice to every shot within my animation.
Block-Out Environment - As I've done for every assignment in the past; once I've established the flow of my final animation, I'll need to block out my environment in a 3D space to set the foundations.
Pre-Visualisation - Another step I'm very familiar with, the final one to complete before moving into production. Once I have a 3D block-out of my environment, it's time to record a sequence of final animation running through it to see how it all flows in motion. From here I can establish any final adjustments needed to shot timings, camera properties etc.
This all seems fairly straightforward and is certainly nothing I haven't done before! I will need to be mindful though of just how important my camera choices are this time around. I think it's going to be really useful to remind myself of all the different shots, angles and lens types available to me before I move into production.
Production
Once the extensive pre-production phase has been completed, I can move onto the actual production itself. Like the previous section, this part on the brief also has it's own criteria and stipulations which I've broken down below:
Kitbash Environment - Kitbashing is a process where something new is created by combining different parts of existing models. In this context, the brief asks me to make an environment for my animation by using models and geometry from different packages. While there's no requirement to actually 'make' anything myself, that doesn't mean it's ruled out. Although I will most likely be using assets from the Unreal Marketplace & Quixel Megascans to create my final environment.
Add Pre-Rigged Characters - Now here the brief does actually stipulate that characters used within my animation must be pre-rigged. Whilst I'm capable of creating characters and rigging them myself from scratch, I believe this is because the primary focus of this assignment needs to be the visual production techniques. I'll be able to source pre-rigged characters from both the Unreal Marketplace and Mixamo, though will need to establish what is available to me in both of these places before deciding on my final narrative. I would hate to settle on an idea then discover I have no suitable characters available to see it to fruition.
Apply Animations - Here the brief also stipulates to source these from the Unreal Marketplace & Mixamo. This means once again that I'll need to do some research on what is available to me before deciding on a narrative. Though I'll admit the knowledge of not having to produce key frame animations and instead focus on the visual production is quite comforting.
Record VCAM - This is where I'll need to essentially record my final shots. Here I'll use the VCAM plugins to capture my final sequences using both my Android phone & HTC Vive, then discuss the differences between the two and establish which I'll use for the final animation.
Export with Suitable Render Passes - This is essentially a reminder to include additional render passes when exporting my final sequences. These will include things like unlit, lighting only, reflections etc and will be used to enhance my final animation during post-production.
Everything in this section of the assignment appears fairly straightforward, although I'm sure the experimentation I'll need to do with the VCAMs could be anything but. Additionally, I've never used pre-rigged characters and animations before, so will admit I'm fairly concerned about trusting these integral details to strangers! We'll have to wait and see.
Post-Production
After rendering out the final sequences, I'll now be able to move onto the post-production phase. This is where the final animation will all come together, and I'll be finalizing my deliverables for the assignment submission.
As with the other two sections, the brief lists the steps and requirements of this phase, so I've detailed them below with a brief notation on how I intend to achieve them:
Cut and Edit Your Shots - This is nothing I haven't done before, though there will be some differences this time! Due to using VCAM and being in physical control of my cameras, I imagine there will be some additional frames that may need to be cut off. Additionally, the actual cutting and editing of the shots will need to be done within DaVinci Resolve, which is a software package I haven't used before.
Post-Process Effects - This is where I'll need to add some final visual effects to enhance the animation. Again this is something I've applied in the past, but never through DaVinci Resolve, though I can imagine the skillset I've built in other software options should translate fairly well! I'll be using effects such as colour grading, transitions, exposure adjustments etc. to make the final animation look as good as it possibly can.
Add & Edit Audio - This process is exactly what it sounds like. I'll be sourcing audio from various sources and compiling it together to make the perfect soundtrack for my final animation.
Export Final Video - Exactly what it sounds like! Exporting the final video within DaVinci Resolve. I need to remember that this will need to be produced as an mp4 video, but resolution and frame-rate are completely up to me!
With the above steps completed, the assignment will be complete! I'll now detail the deliverables below as a reminder of what I need to produce and in what format, before moving onto a discussion of some initial ideas.
The Deliverables
There are 4 items which I will need to submit as deliverables for this assignment. I've decided to list them all below as both a checklist and reminder for when I progress further into this assignment, as well as a reference for what each one actually is (plus any required submission format).
Pre-Viz Animation - This will be created using my blocked out 3D environment as part of the pre-production phase. The brief stipulates that this should be produced as an mp4 file, but makes no mention of resolution or frame-rate. The Pre-Viz is essentially a build on my storyboard to establish how well the camera placements, movements, lenses etc work when applied to an actual animation in 3D space.
Post-Production Timeline - While the name of this deliverable implies some kind of written documentation regarding my post-production process, it's actually the final DaVinci Resolve file which contained all my post-production adjustments and effects. I'll need to ensure that I make enough alterations as part of the post-production process to justify this submission, as well as ensuring that they are all included when compiling the final file.
Final Animation - Simply put, this will be my final animation that I create from this assignment. The brief states to submit this as an mp4 file and that it must be no longer than 30 seconds, but other than that the remaining properties are up to me.
Presentation - While this isn't stated as a submission requirement, I did notice the 'output to be marked' section at the end of the brief lists a presentation. I assume this is along the same lines as the one produced for the first VFX assignment: an overview of the full creative process of the final animation, but this time with a key focus on the implementation of VCAM.
Initial Ideas
While I love the amount of creative freedom I have for this assignment in terms of narrative, environment, characters etc. It can also be a double edged sword.
I've recently had a lot of health issues, which has resulted in me having far less time to explore all the different ideas I have than I would have liked. Additionally, as I mentioned earlier in this post, the fact I'll be using pre-rigged characters and animations means I'll be limited by what I can find on both the Unreal Marketplace and Mixamo.
The other thing to remember of course is that my cinematic will be 'filmed' using VCAM, which should influence the artistic direction of the narrative. When I think of free-hand camera used in cinema, I think of fast paced running scenes, or where the camera moving as if it's held by a person is part of the narrative (think Blaire Witch or Cloverfield).
To that end, I've decided to explore 3 ideas I had when viewing the assets available to me, before ultimately deciding on which one to proceed with in the next post. I've listed all of them below for your reference, and to help me get some of my ideas down in front of me to assist with the decision:
Cyberpunk Free-runner: I discovered some wonderful pre-rigged characters on the Unreal Marketplace that all have a distinct 'cyberpunk' aesthetic, and Mixamo comes jam packed with running & jumping animations. Couple that with the boom of cyberpunk environments in circulation following the release of Cyberpunk 2077 back in 2020 and there's so much I could do with this theme!
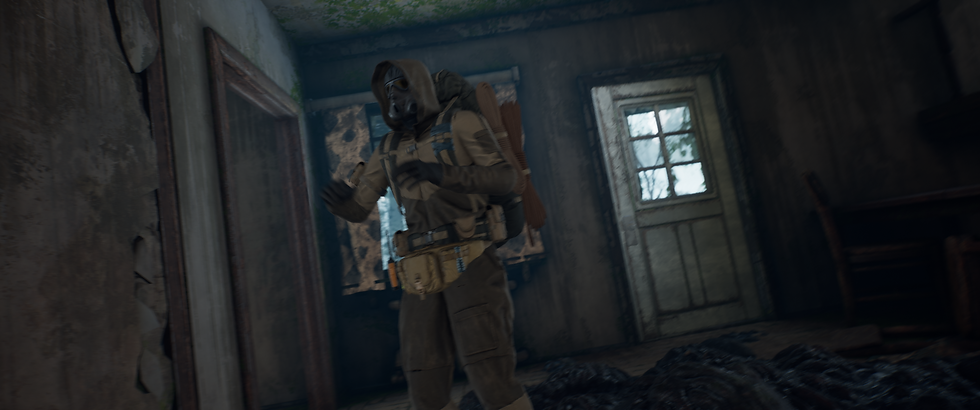
Cryptid Horror: When I think of hand-held camera being used in cinema, I instinctively think of horror movies. When browsing the available assets I located some amazing monster models than came pre-rigged with a variety of animations included that I could easily use to make a short horror animation!
Car Chase: This is a bit of a wild card, but I love car chase scenes in action movies. The nature of VCAM would allow me to create some great chase camera angles, where the 'janky' movement of the camera would be used to heighten the action and speed. The marketplace is full of plenty of car models, and the rigging necessarily wouldn't be an issue due to the nature of car's movements! There's a lot that could be done with this theme as well!
That brings me to the end of this post. I have a lot to think about here, especially when it comes to deciding on my final narrative theme as I believe I have a lot of strong contenders! Either way, I'm excited to be back working on a new project following my health issues earlier in the year, and can't wait to see what I create.
In the next post I'll be choosing my final idea to proceed with and beginning the pre-production phase!


Comments