Cleaning & Retopologising the Models
- Mikey Owen
- Nov 2, 2022
- 12 min read

Updated: Nov 15, 2022
Now that I have my 5 models produced in the optimal software of my choosing, all that remains is cleaning up the scans and retopologising them ready for placement within a scene.
Like with the photogrammetry software, there's a variety of applications and methods I can apply for these processes to achieve the result I want. I'd therefore like to do the same as I did in the previous post and discuss each of these options in depth. Then I can ultimately decide on a preferred workflow for clean up and retopology.
Of course attempting each of these methods on 5 different meshes is impractical, so I've decided to limit my studies to just one mesh to begin with, the simple rock. Once I've established an optimal workflow, I can then apply it to the remainder of the meshes. I've included a refresher image of the simple rock mesh below as a reference:

Just from looking at the image above, you can see there's a lot of additional terrain surrounding the subject that will need to be removed. It's important that I find methods for clean up and retopology that optimize the geometry but don't affect the quality of the mesh.
Mesh Cleanup
Mesh cleanup is essentially the term I'm using for the 'trimming of the fat' off the meshes. The nature of photogrammetry will always result in additional geometry apart from the subject being captured, due to things like the background or terrain.
My experimentation with the photogrammetry software and prior knowledge of 3D applications has lead me to 3 options for mesh cleanup:
Autocrop facility in ReCap - ReCap comes with a simple to use autocrop tool which you can toggle on when creating the mesh.
Manually deleting the excess geometry in Maya - This option doesn't necessarily have to be done with Maya, it's simply my 3D application of choice.
In house facilities of Zephyr - Just like ReCap, Zephyr also has tools unique to the software designed for the cleaning up of your photogrammetry meshes.
I'd now like to analyse each of these options individually, applying them to the simple rock mesh and weighing their pros and cons as I did with the applications in the previous post.
ReCap Autocrop -
It felt right to begin with this method, as this is something I'd experimented with during the mesh construction as I was curious about it's effectiveness.
The workflow is incredibly simple; all you need to do is check the box for autocrop when uploading your images, and ReCap with attempt to crop out the terrain around the subject when processing the mesh.
I've included comparison screenshots below to demonstrate it's effectiveness:


As you can see from the uncropped image, there was alot of additional background and terrain geometry generated in the photogrammetry process. I'm actually quite impressed with how well ReCap has done with cutting this all away and giving a nice flat, circular ground plane around the subject.
While leaving this ground space is great for blending the scan into scenes in the future, the autocrop facility doesn't allow you to adjust just how far out this ground plane goes. This is quite a small subject, being only a single rock, so I feel far too much of the ground still remains.
Additionally, as this feature is part of ReCap, it would rely on using the ReCap meshes in order to have this as my chosen clean up meshes. As you will recall from the previous post, I actually voted ReCap as my least favourite of the photogrammetry softwares, so this is unfortunately a deal breaker in my eyes.
Manual Removal -
Now we move onto what I imagined going into this would be my preferred method of mesh clean up. Manual deletion of extra geometry in AutoDesk Maya.
The workflow for this will be equally simple, but admittedly will require a larger time investment. I'll begin by importing my preferred scan into Maya (in this case the Zephyr mesh), where I'll enter polygon move and drag over the sections of the geometry I wish to remove, then hit the delete key.
I've now completed this process with the simple rock, as just as I have done above, I've included comparison images below for your reference:


Already the differences between these first two methods are night and day. Admittedly, the Zephyr mesh had more geometry to remove at varying height levels, but as I was completing this step in Maya; my prior knowledge of the orientation tools avoided this being an issue.
I feel I may have been a tad overzealous with just how much I removed from the mesh, but I wanted to highlight how more control I had within Maya over the auto-cropping tool. I've been able to take the clean up right up to the edges of the rock, and could take this even further if I went into removing the edge polygons one row at a time. However for the final result for my look development video (more on this in the next post), I will probably maintain a more circular podium, closer to the result of the ReCap autocrop, than what I have here.
As it stands, this is my preferred method of clean up due to how much more control I have over the results.
In House Zephyr Tools -
Now I wanted to experiment with some of the in house tools that my photogrammetry software options came with, starting with my preferred application option 3DF Zephyr.I knew from watching tutorials and briefly scouring the menus that Zephyr had these tools, but I was surprised by just how in depth they were.
The clean up process was quite straight forward, surprising when compared to the complexity of the workflow of actually producing the scans there. I would use the edit button on the right hand navigation menu to enter a different mode of the viewport. From there I can select a variety of different selection options like; box, oval, manual, polygon, edge etc. to draw around my subject. After this you can invert the selection to select everything but the object, and separate it into a different mesh. From there it's simply a case of deleting the extra mesh, and using the orientation tools to flatten the edges parallel to the grid.
As with the other options, I've included a comparison of the scans before and after using this method to clean the mesh below. Though because I used the Zephyr scan for this option, you'll note the before image is identical to the manual method above:


Once again I'm incredibly impressed with the versatility of Zephyr. It's immediately apparent from the cropped mesh that this is a culmination of what I liked about both of the previous two methods. The quality of the scan is the best of the 3 versions, and the clean up performed in Zephyr is also the best so far.
The fact I've been able to use the scan of my choice, while also creating a perfectly circular plinth around the subject (to assist with scene blending) is exactly what I was hoping for!
Conclusion
After testing these 3 methods of clean up; I can confidently say that I'll be using Zephyr's in house tools as my preferred method going forward.
It's ability to adjust the orientation of the mesh, while allowing precise cutting facilities that rival Maya's ability to do so (at a fraction of the time investment needed), really cement this choice as the obvious winner.
Maya's manual clean up does come in a very close second, (and may even overtake Zephyr for scans which do require the most precise 'polygon-perfect' levels of clean up), as it's level of control will never be matched by shape based slicing. Followed by ReCap's auto crop. While I'm still impressed by the speed and effectiveness of the auto crop, it doesn't allow a lot of flexibility and still results in too much additional geometry for my liking.
Retopologising the Mesh
Now that we have the mesh cleaned up, it requires retopologising. The scan itself in it's raw form, even cleaned up, has close to 1 million polygons or varying sizes. This results in a complicated and poorly optimized topology flow which makes the mesh incredibly difficult to work with in a practical CG scene (unless we're using Unreal Engine 5, though more on that in a future post).
Therefore the polygon count needs to be brought down to something much more managable, and the topology needs to be as evenly spaced as possible so that I can use the mesh as an asset in future projects.
I have a few options in mind for how I'm going to achieve this, which I'll breakdown below:
ZRemesher facility in ZBrush - ZBrush is primarily a software designed for sculpting in a 3D space, but does come with a variety of automated options for mesh cleanup. One of these is ZRemesher.
Instant Meshes - This is a free software options which comes highly recommended by CGI artists across the world as the go-to software for topology clean up.
Manual Retopology in Maya - As the previous two options are all automated, I wanted to also attempt manual retopology using Autodesk Maya to compare the differences in methods.
As with the clean up section above, I'd like to now breakdown the retopology options so that I can establish an optimized workflow for this process.
ZRemesher in Zbrush -
ZBrush, as I touched on above, is primarily a 3D sculpting program offered by Pixologic (more information can be found here). Instead of polymodelling like you would in applications like Autodesk Maya & 3DS Max, Zbrush provides you with a lump of 3D 'clay', which you use a variety of methods to sculpt into your desired model; brushes, pinching, pulling, deforming etc.
I've been using ZBrush since my first year of College, and have even applied the ZRemesher process to a variety of models I've constructed, but the short hand of it is that ZRemesher will automatically retopologise your model at the click of a button. You simply input a target polycount (or a more loose option like 'double' or 'half' the original count), define parameters like how well it will stick to the original edge flow, and click 'Remesh'. The software will then process your request and remesh your model to the indicated target, whilst also cleaning the topology flow in the process.
Following this, you can then even 'project' the original mesh onto this new lowpoly variant. This tells Zbrush to attempt to alter the edge flow to better match the original, just in case too much detail was lost during the remesh process.
Honestly this facility has been a God send in the past, and so easy to apply, so I'm expecting good results here. I've included screencaps below of of the mesh in the Zbrush viewport before and after remeshing:


Already I'm incredibly impressed with this result. From the image of the original mesh, it's hard to even see the topology flow due to just how many there are (close to 1 million). However on the remeshed model it's truly night and day.
The retopologised mesh has a clear topology flow, all evenly spaced and following the contours of the mesh perfectly. Some detail has of course been lost, as will always be the case when lowering poly counts. But these can be reapplied later via normal maps in the texturing stage (more on that in the next post).
With the focus of this comparison being centered purely on topology, this is a great result for the first option!
Instant Meshes -
Instant Meshes is completely new territory for me (given my experience with Zbrush and Maya as the other two methods). However, as I mentioned as the start of this section, when I was researching options I found that it is highly regarded as the best retopology solution by CG artists worldwide.
Instant Meshes is a free open source executable file (in a similar vein to Meshroom) created by a lab at ETH Zurich. It has an incredibly simple, yet very comprehensive workflow. As it's a new piece of software for this assignment, I've included a screencap of the viewport below so you have a reference for my explanation:

As you can see, it's a very simple workspace. No confusing UI, and a lot of the options available are self explanatory.
For my retopology workflow, here are the simple steps I followed: Use the open mesh button to import my 3DF Zephyr rock mesh, set a target vertex count (in this instance I chose around 10k to mimic the output from ZRemesher) then hit solve on the orientation tool section to preview the results as they stand currently. This gives you a rough wireframe so you can see the topology flow with the current parameters, which I was unhappy with. I then used the comb button to effectively draw the dominant edges onto the mesh (like the top rim of the rock and where it meets the ground - think of drawing seems for UV maps) and solved it again. I was much more happy with the result this time.
From there I moved to the position field set of tools and hit solve to display a preview of the newly adjusted wireframe. This looked much clearer already, but I also used the paint brush icon to identify 'problem areas' to Instant Mesh where it needed to recalculate edge flow. Once this had been completed, it was simply a case of hitting export mesh, previewing the final result and saving it as an OBJ file in the directory location of my choice!
That's that! A simple workflow from a fantastic bit of open source software that I have to say I'm really impressed with. I've included the results below as they appear in Instant Mesh for your reference:


I have to remark once again just how impressed I am with Instant Mesh. ZBrush achieved great results for sure, but the simplicity of this workflow and the speed with which it calculated the results (not to mention the amount of manual direction I was able to apply, instead of ZRemesher's 'one-click-done approach) is phenomenal.
You'll note I've had to really zoom in on the original mesh to show it's wireframe, which is another testament to just how high poly and clustered this mesh is. But it's clear to see when looking at the images side by side, just how much Instant Mesh has improved the topology and flow of the geometry.
Despite what I said about Zbrush, this is absolutely the clear winner for retopology workflow as it stands currently!
Maya Manual Retopology -
Now comes the option that, frankly, I'd been dreading. The speed of the automatic retopology options was impressive, but I do really need to test the efficiency of manual retopology to gain a comparison and good understanding of all the options available to me.
I chose to do this in Autodesk Maya as it's the 3D application most familiar to me, and I've detailed the workflow below:
The first step is of course bringing the mesh into Maya. I once again opted to use the simple rock model exported from 3DF Zephyr. From there I need to make the object 'live' (by clicking the magnet button just below 'mesh display' on the top bar). This prevents me from selecting the mesh, but informs Maya that all geometry created from here on needs to 'stick' to this object. You then bring up the modelling toolkit in the top right corner of the UI, and use the quad draw tool to begin drawing all the polygons manually.
From there you use the left click to draw the 4 corners of your first polygon (I chose to start right at the edge of the model) and hold shift and click to fill it in. From there you can hold tab while hovering over an edge to drag it out and extrude it into the next one. After using this to complete an entire loop around the edge, I then manually adjusted the inner vertices to give it a good flow, and repeated this process until I reached the rock itself.
I decided to use the natural edges of the geometry (i.e. where the grass ends, where the top of the rock begins etc) as the indicators for where to place the edge loops. I could then hold shift and 'paint' over the model to smooth the edgeflow and make all the polygons evenly spaced, with the inner flow by the rock dictating the rest of the geometry. From here I continued the process to build up onto the top of the rock, then closed off the polygons in the centre.
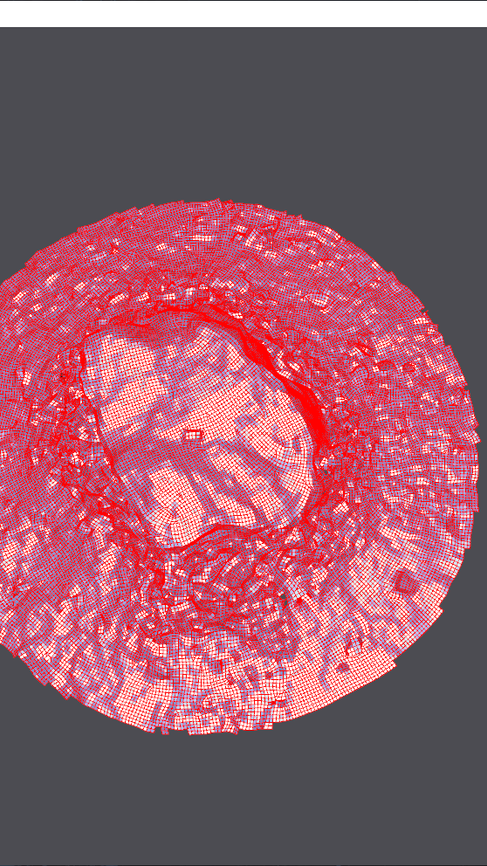
Now I could hold control to start inserts more edge loops in the geometry, followed up by smoothing them all out again until I was happy with the result! I've included screenshots of the before and after stages in Maya below:


As you can see, I've once again had to zoom in on the original mesh quite heavily just to get the wireframe to be visible due to how dense the mesh is. Which only serves to show just how much better the retopology is.
This was absolutely the most time consuming of my three methods, but I can't argue with the results. The topology flow when completed manually is a vast improvement over my other two results, the polycount being far lower and must easier to work with. However, it has to be stated that I don't think this justifies the time commitment for a static scene object.
Conclusion -
After testing these 3 retopology methods, I can say without a shadow of a doubt that I prefer Instant Mesh as workflow going forward.
The others of course have their benefits; ZRemesher's speed and convenience is unmatched, and manual retopology allows a level of control that automated methods can only dream of. However it's for this reason that I chose Instant Mesh, as it's a 'best of both' scenario.
Instant Mesh allows all the convenience of an automated facility, but also gives the user the control to define specific key edge loops and alter the result before committing time and processing power to it.
As I said in the summary for manual retopology though, when I come to the creation of the characters for my project, I will absolutely be returning to that method. It is clearly the winner for an animation based workflow due to it's level of control, but for scene objects I much prefer the speedy facilities of Instant Mesh.
With that, we've reached the end of this post. All that remains now is to apply my chosen clean up and retopology methods to my remaining meshes, reclaim the textures lost during this process and create a look-development video to showcase them. All of these will be included in the final post.


Comments